Pages

Sunday, March 30, 2014

Okra rice/Vendakkai sadam

Whenever I go to the grocery store to buy vegetables my eyes automatically starts to roam around in search of okra, as okra is one of my favorite vegetable. I usually make a curry, kootu, fry, more kuzhambu or sambar using okra but this time I wanted to make something different, so decided to make okra rice in my own style. 
                                 

Nutrition value of the okra 

  1. High in fiber
  2. Vitamin C
  3. Folate
  4. It has a high content of antioxidant.
  5. Good source of calcium and potassium. 

Ingredients 

Okra/vendakkai (cut into medium size)
1 lb
Onion (thin sliced)
1
Tomato ( fine chopped)
2
Basmati rice
1 ½ cup
Ginger garlic paste
1 tbsp
Red chilli powder
2 ½ tsp
Coriander powder
1 tsp
Turmeric powder
¼ tsp
Garam masala
1 tsp
Salt
As needed
Cilantro (fine chopped)
2tbsp
Oil : ghee
1:1tbsp

Method

Okra rice should be done in 3 steps.

Step: 1
  • Soak the basmati rice for 10-15 mins. Meanwhile boil water for cooking the basmati rice.
  • Once the water starts to boil, add salt to it and then add the soaked basmati rice. Cook until the rice boils nicely. 
  • When it starts to boil stop the flame and close the rice with the lid. Keep it aside for 10 mins. 
  • In the boiling water itself the rice will be cooked. After 10 mins drain the water from the rice completely. 
  • Then keep it aside.

Step: 2

  • In a skillet heat oil and add turmeric. When it starts to bubble add the okra to it and give a quick stir, wait for 5 mins.
  • Now add salt, 1 tsp of chilli powder and stir fry it with any equal interval until the okra are fried completely.
                              

Step: 3

  • In another kadai add oil:ghee wait till it gets hot, then add onion fry till it turns light golden brown color.
  • When onion turns color add ginger garlic paste, fry in medium flame until raw smell goes.
  • Then add tomato, along with it add salt, turmeric powder, red chilli powder and coriander powder mix well till the masala blends with tomato and onion. Wait until the tomato mushy and oozes out oil from the masala.
  • Now add cooked rice to it and mix it well. Wait until the masala gets absorbed by the rice. 
                                 

  • When masala coats with the rice nicely, add the fried okra to it and give it a quick stir. 
  • Finally add chopped cilantro to it. Now hot and yummy okra rice is ready to be served.
                              

  • Serve it hot with chips, any raita or it goes well with plain yogurt.  
                              

Tips

  • Choose the okra young while buying( how to find its young? if you break the tail end of the okra it should break crispy).
  • Don't cut the okra into thin slice, cut it into medium size. Because when you cook okra it should not break.
  • Remember the okra should be cooked completely before adding it into the rice mixture.  
  • You can also avoid first step and directly cook the basmati rice along with the masala itself.


Check out our other rice recipe also cilantro-lime-rice
Linking this post to

Joybee, What's for Dinner?

Thursday, March 27, 2014

Roasted Peanut Salad

Yippee!! I ll be traveling to India soon and I am thrilled to bits, so SO excited  There are lot of things I miss about India.

  Family and friends of course are at top of the list (Oh! Skype, what would we do without you)

My favorite food- Though we get Indian food and groceries here there are certain few things I am not contented with.One such thing is peanut salad. 

During my college days my friends & I used to go to this restaurant like once a week just to eat this. It was so funny that the waiters stopped giving us the menu card after few days and happily served us the salad. I made my version of this salad and although it wasn't really close to the one I love, my husband loved it :)


So what exactly is this roasted peanut salad ?

It's simply a salad which is protein rich, scrumptious and refreshing since it is made of fresh ingredients & super easy to whip up.


INGREDIENTS
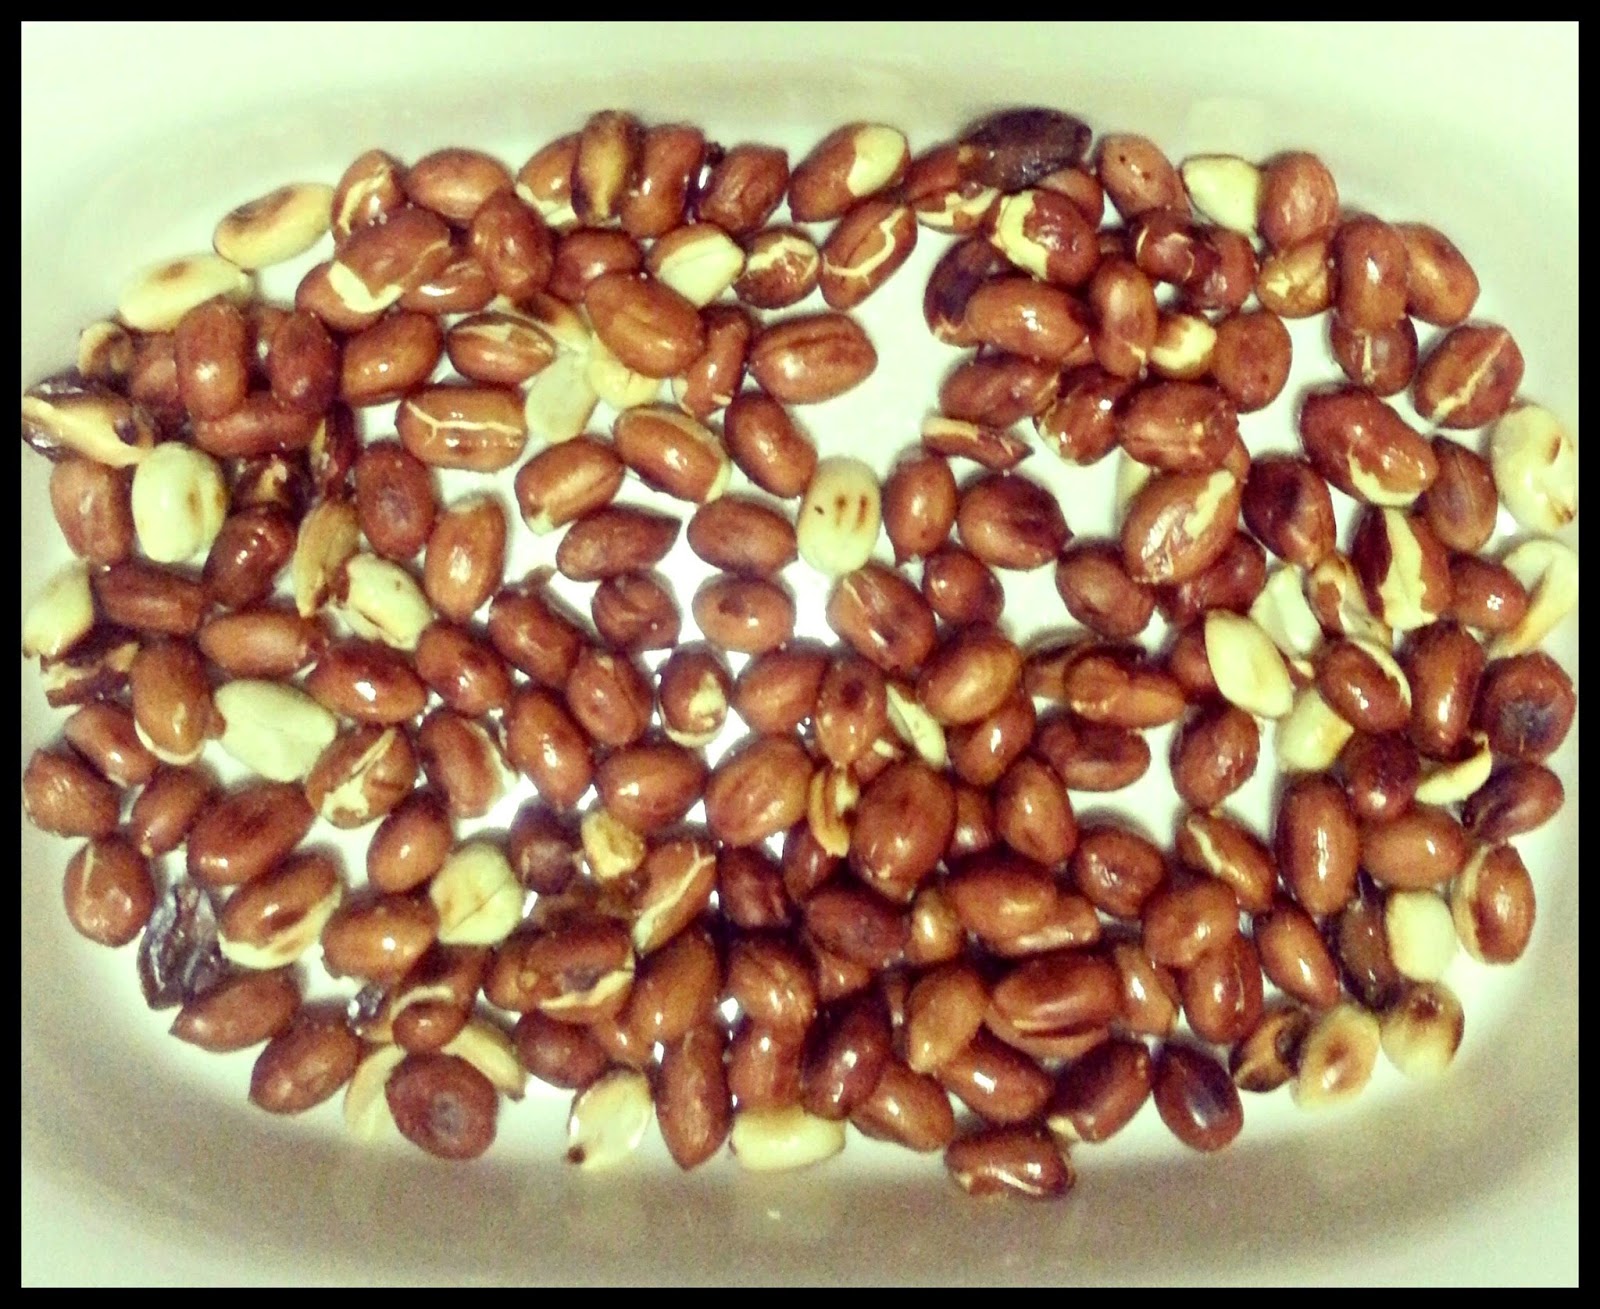
  • roasted peanuts - 2 cups
  •  chopped onion - 1 cup
  • chopped tomatoes - 1 cup
  • chopped cucumber - 1 cup
  • finely chopped green chilli - 1 or 2
  • juice of lemon - 1 tbsp
  • chaat masala - to taste(optional)
  • salt - to taste
  • finely chopped cilantro - to garnish 

METHOD 
Add the roasted peanuts in a bowl.

Add onions & green chillies

 some tomatoes
and some cucumber
add salt, lime juice & chaat masala
 Toss well and garnish with finely chopped cilantro.

Serve it as tea time or mid night snack with some drinks

Linking this post to
Savoring Saturdays Favorite Recipes Event favorite recipes event
The 36th Avenue


Tuesday, March 25, 2014

Cauliflower Fry


Given a contest between ‘Vegetables & Fruits’, you can easily spot me cheer-leading to my heart's content for the fruits. I am anytime a fruits lover than veggies’. In fact, I am giving most of the vegetables a ‘taste try’ only after marriage and credits to my husband for literally forcing me to. But there are few vegetable dishes I love … for which I might even ditch the fruits (am sorry!!) and take the opposite stand. 

Will it be so obvious if I say those are vegetables that are fried... like potatoes, cauliflower etc. Duh! I know!

I came across this cauliflower fry recipe in an Indian cookery show- Kitchen Super star and I immediately knew I would love it. I gave it a try and as always, I was right! I LOVED IT. So here is the recipe of my favorite cauliflower fry.


Ingredients
Cauliflower - florets - one cup
Equal proportions of Besan (chickpea flour), Corn and Rice flour – I used 3 tsp each.
Turmeric powder - 1 Tsp
Water
Salt
Oil - to fry

To Grind:


Mint leaves - Handful
Coriander leaves - Handful
Curry leaves - 5
Green chilli - 2-3
Garlic cloves – 4

Preparation:
Cut the cauliflower to bite sized florets and soak them in water with turmeric  for 15 minutes. Drain the water and keep the cauliflower aside.
Grind the ‘To grind’ ingredients to a paste using water.

Method:
  • Add the paste to the cauliflower along with salt.
  • Add the flours and turmeric powder.
  • Give it a good mix making sure all the florets gets coated with the paste.
    • The flour forms an outer layer to the floret which ensures that the ground paste sticks to the florets. This layer, when fried gives the cauliflower a crisp.
  • Keep this mixture aside for 15 minutes.
  • Heat oil in a pan; fry the cauliflower in medium flame.
    • Make sure the oil is hot before you start frying.
  • Drain the excess oil in a strainer or place on the tissue.
  • Serve hot.

Thursday, March 20, 2014

Avocado Pina Colada Bars

Every time I go to Costco I am drawn towards Fruits aisle and I have been obsessed with avocados lately. I have been including them in my breakfast, lunch and what not! Just when I thought I was running out of ideas I came across this fun treat by Raia' Recipes and I couldn't wait to try it. Well I wouldn't say this is copycat version of it since I have changed few ingredients as per my Mr.Taste Buds's demand.Here we go, No BAKE ! No SUGAR! No Artificial colors! Less dishes to wash!- You are going to love these bars.  

How many Pina Colada lovers out there? Pina Colada is a Puerto Rican cocktail made with rum, coconut & pineapple juice. But in my dictionary anything I make with coconut & pineapple is Pina Colada :P

Saturday, March 15, 2014

How to remove unwanted stickers?

Hello folks! It's been quite some time since we posted an interesting tip. Thanks to all you awesome people out there who wrote back that the cilantro storage worked wonders for you just like it did for me. I was recently into re-organizing and that obviously included re-using of old containers for storage. That was when I realized how frustrating it can be when you try to remove the labels/stickers from containers and get your finger nails all chipped.  

And then comes the next headache – price stickers! I don’t understand why few price stickers are hard glued, that it's next to impossible to remove them. I seriously doubt if it is any form of advertising that the companies  has taken up so we don’t remove the stickers and market the price everywhere we take the product. Clueless!

But here is a quick solution for removing any stickers in few seconds with absolutely no scope for frustration.

All you need is a hair dryer!


  • Aim your hair dryer at the sticker you may want to remove and blow hot air to it for about 30 seconds.
  • Try peeling from a corner of the sticker. If it doesn’t peel off, blow hot air for another 30 seconds and try again.
  • You should now be able to peel off the sticker completely.

  You can now have sticker free products! Reuse any old containers for storage and also you need not worry about carrying along with you the price stickers of snack box, lunchbox, water bottles etc.

Note: 

1. On further browsing, I came to know that this method can be used to peel off the bumper stickers as well. I have not personally tried it, though.

2. I went all crazy and removed the stickers from whatever products I could come across.That was when I found out that if you blow very hot air very close to a 'not so good' quality plastic container for a long time,it might actually damage the container. One of my container has a dent in one corner as a result of this. Damage is really minimal but I think I should mention it.So make sure you blow the hot air not too close to the container and not more than 30 seconds initially. If it doesn’t come off, you can always do the next 30 seconds.


Linking this post to: How to Tuesday

Wednesday, March 12, 2014

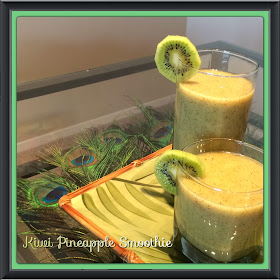
Kiwi Pineapple Smoothie

Whop! what an unrelenting, bitter winter it has been in Chicago. I have been longing for Spring and I'm pretty sure most of us areI'm crazy about smoothies and I love to try various blends. Pineapple is one of our all time favorites. Instead of having a simple pineapple smoothie, I wanted to blend kiwi with pineapple and give it a shot. It was truly a trial but the fusion was really amazing. The preparation is pretty simple and its not only yummy, but packed with good benefits as well. Now here you go with the recipe..... 

About ingredients 

Kiwi: It is nutrient dense fruit which help to maintain healthy skin tone and texture, reduce BP and heart healthy. Most important aspect in kiwi is, its an immune booster. It contain Vitamin C and antioxidant.

Pineapple: It is an excellent source of  manganese which helps in building strong bones. It also has anti-inflammatory property, when taken regularly it helps preventing arthritis in elders. It has another important benefit in it, that is anti-coagulant.


                                                     Preparation Time: 5 mins
                                                      Serves :  2


Ingredients

Pineapple (cut into chunks)
1 cup
Kiwi ( peel skin off and cut into chunks)
1 cup
Honey
2 tbsp
Ice cubes
½ cup


Method 

  • Put all the ingredients mentioned above in a blender and blend till it get to a smoothie texture.
  • Now pour the mixture into a tall glass and serve it cold :)

Tips 

  • You can also use frozen pineapple, but I used a fresh cut one for this smoothie.
  • You can also freeze the kiwi in a Ziploc bag and use it.
  • If the fruits are frozen then you can avoid using ice cubes.
  • You can also use sugar instead of honey.
  • You can also add one banana with these fruits. If you add banana, don't add sugar or honey. The fruit itself will have right amount of sweet in it.
                       
 
Please try our other smoothie and milkshakes and do tell us your comments.

Slushy Strawberry Smoothie

In today's post I am sharing a super slushy, healthy (sort of), refreshing, satisfying, tingling, quick & fun to make ...Whew! I am running out of adjectives to describe my personal favorite- Strawberry Smoothie Recipe. The best part is you can make it a day ahead, freeze it and you can just grab n go to work/school !! *happy dance*

Just 3 Ingredients  |  Serves 1 | Time -5 min

 
- 3or4 fresh strawberries (hulled)
- 3 tbsp yogurt
- 2 tbsp honey / sugar


 Method

1. Pack strawberries in zip-lock kind of bag and freeze it for 2 hrs.

2. In a blender add all the ingredients and blend it until smooth and slushy .

3. Pour into tall glass and enjoy. And hey, sometimes you might need a spoon cos its' THAT thick !! :)  


Tuesday, March 11, 2014

Healthy Avocado Sandwich :)

Hello all ! I'am Avocado, I'am also called as the "Alligator pear" due to my shape, color and texture. I'm good for your health, do you wanna know how? I'm.. 
1. Rich source of fiber, potassium and folate.
2. Useful amount of vitamins C,K and B6.
3. Good source of heart healthy unsaturated fat.
4. Good amount of mineral like iron. 

      *****************************
Every morning I get bored of having either cereal or pancakes and I wanted to have something different for breakfast, so decided to make a healthy avocado sandwich. 

You must have heard about the avocado dip for tortillas, I decided to make a similar spread for bread, which is a healthy and fulfilling alternate. You can make it a complete meal with your choice of fresh juice or smoothie. This is a quick and easy recipe made with healthy ingredients. 
                         

Monday, March 10, 2014

Mint Thogayal/Paste

I know many of you would be wondering what this thogayal (pronounced as tho-ga-yal) is all about. I was storming my head all day long wondering how to explain but miserably failed to make full justice to the dish-

 ‘It is a thick paste/dip that is flavorful, tangy and aromatic.  I believe many of you would have come across Indian chutneys and this dish is very similar to that but thicker in consistency. Confusing? Lets just say it is a south Indian condiment that goes best with white rice.'

To me, comfort food is synonymous to something I crave for on a lazy day and this ‘Thogayal’ tops the list of my comfort foods as it can be prepared in no time and there is this happy ‘me’ relishing them with full gusto.'

So why don’t you give it an attempt to find out for yourself what I am talking about. Feel free to comment what you think is equivalent to this dish in your respective cuisines.

Wednesday, March 5, 2014

Cilantro-Lime Rice

I am so chuffed that you all liked my Veggie-Tofu recipe. As promised, here I am with the recipe for cilantro-lime rice. Usually at restaurants you find it as a side for any Mexican food or used as filler in burritos. 
This recipe is a huge hit in our family and there's more than 1 reason why we love it. 1) it's so quick to make  2) it's a flavor bomb.

Tuesday, March 4, 2014

Carrot Milkshake


'Dear Winter, I don’t know how else to say this. But we are done. IT IS OVER! It  was love at first sight 5 months back when I first met you in Chicago. But you  have become too much to handle these days and also too commanding. Apart from the fact that you don’t let me wear my favorite dresses,  you do not even allow me to have my favorite milkshakes! But now it is time for you to leave and please do not stick around longer. I have had enough of you  already.Good bye!'

Monday, March 3, 2014

Chana Masala

Chana Masala is commonly known as "Chole Masala". It is a popular vegetarian gravy which goes well with roti, bhature, naan and poori. I love it with steamed basmati rice :). This is my husband's all time favorite gravy. The main ingredient is chickpeas cooked in tomato puree. My mother makes this recipe very often. I learnt this gravy from her, but slightly changed the version. In later post I will show u how to make this gravy with coconut. Here you go with the recipe without coconut .....